Password Synchronization with Oracle Database
Steps to configure Oracle Database accounts with ADSelfService Plus
Important : Install the Password Sync Agent to synchronize native password changes and resets.
-
Log into ADSelfService Plus admin console with admin credentials.
-
Navigate to Configuration → Self-Service → Password Sync/ Single Sign On.
-
Select the Oracle Database application.
Note:
You can also find Oracle Database application that you need from the search bar located in the left pane or the alphabet wise navigation option in the right pane.
-
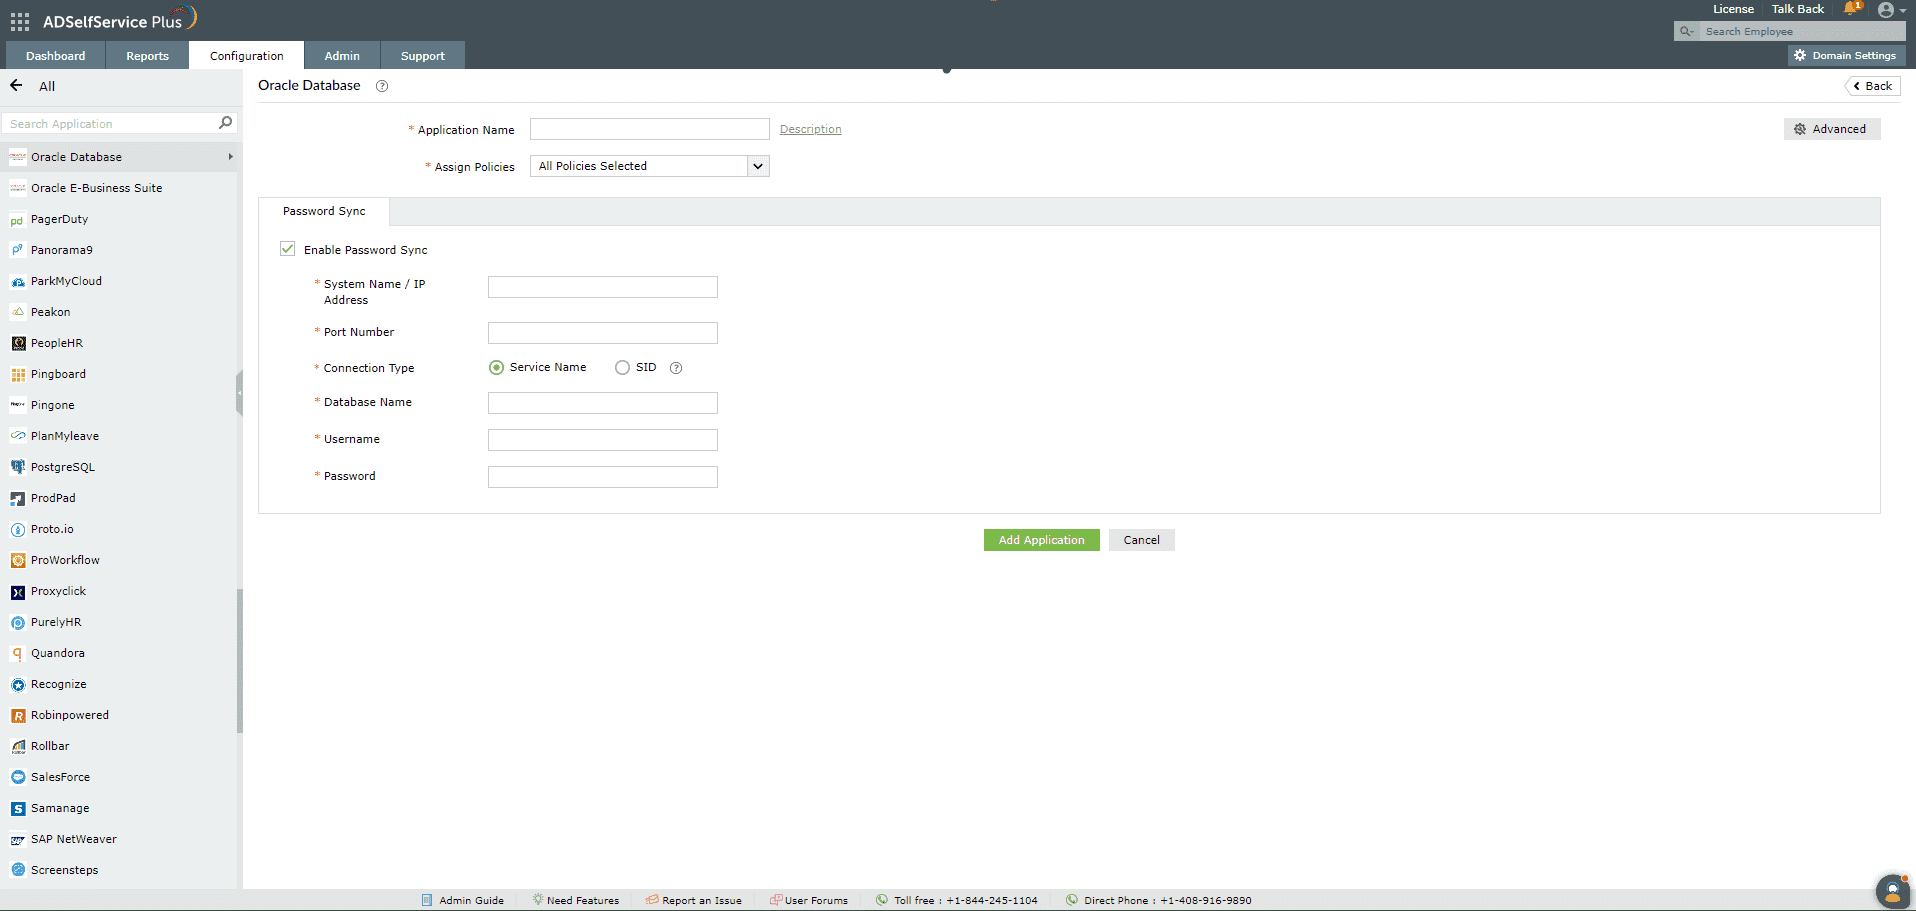
Enter the Application Name and Description.
-
In the Assign Policies field, select the policies for which password sync need to be enabled.
Note:ADSelfService Plus allows you to create OU and group-based policies for your AD domains. To create a policy, go to Configuration → Self-Service → Policy Configuration → Add New Policy.
-
Select Enable Password Sync.
-
Enter the System name or IP address and the Port Number of the Oracle Database.
-
Select the Connection Type. It can be either the Service Name or the SID (System Identifier).
Note:
The Connection Type is determined by how the Oracle Database is configured in your organization. Please contact your Oracle Database administrator for this information.
-
Enter the name of the Oracle Database in the Database Name field.
-
Enter the Username and Password of the Oracle Database
-
Click Add Application
Copyright © 2026, ZOHO Corp. All Rights Reserved.


 ADManager Plus
 ADAudit Plus
 Exchange Reporter Plus
 M365 Manager Plus