Auto-enrolling users by importing data from external databases
Using this option, you can connect databases such as Oracle, MS SQL, MySQL, and PostgreSQL to ADSelfService Plus and import the enrollment data stored in them. This option is useful if you already have the necessary enrollment data available in an external database.
Before importing the data, ensure that the required authenticators are configured under the required policies.
To learn how to set up the authenticators supported by ADSelfService Plus,click here.
Import data formats
The imported data must follow the specified formats for each authenticator, as detailed in the table below.
Note:
The database header names listed are samples. You are not required to use the exact same names. sAMAccountName is mandatory and must be a valid username present in AD.
| Column names |
Allowed formats |
| question |
It must be a security question. Eg., What is your favourite colour? |
| answer |
It must be the corresponding answer to the security question. Eg., Yellow. |
| mobile |
It must contain numbers 0 through 9. |
| mail |
It must be a valid email address |
| sAMAccountName |
It must be a valid user in AD. |
| googleauthsecretkey |
It must contain letters "A-Z" or "a-z" and numbers "2-7". |
| microsoftauthsecretkey |
It must contain letters "A-Z" or "a-z" and numbers "0-9". |
| zohooneauthsecretkey |
It must contain letters "A-Z" or "a-z" and numbers "0-9". |
| customtotpsecretkey |
It must contain letters "A-Z" or "a-z" and numbers "0-9". |
| customtotphardwareserialnumber |
It must contain letters "A-Z" or "a-z" and numbers "0-9". |
Important note:
- The length of secret keys must be greater than or equal to 16 and lesser than or equal to 350.
- The length of serial numbers must be greater than or equal to 4 and lesser than or equal to 250.
Steps for establishing a connection with the external database
- Log in to the ADSelfService Plus web console as an admin.
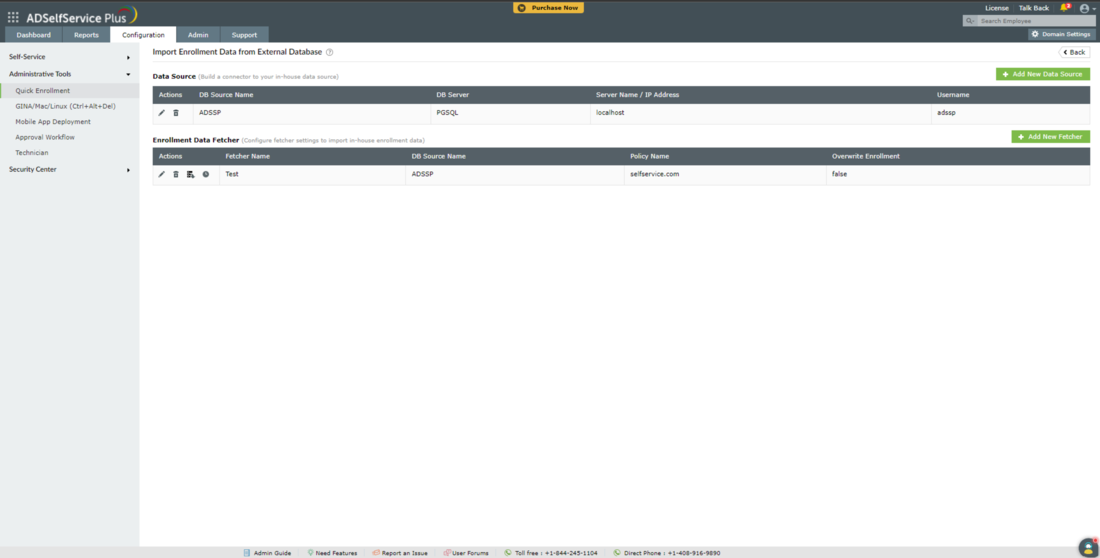
- Navigate to Configuration → Administrative Tools → Quick Enrollment → Import Enrollment Data from External Database.
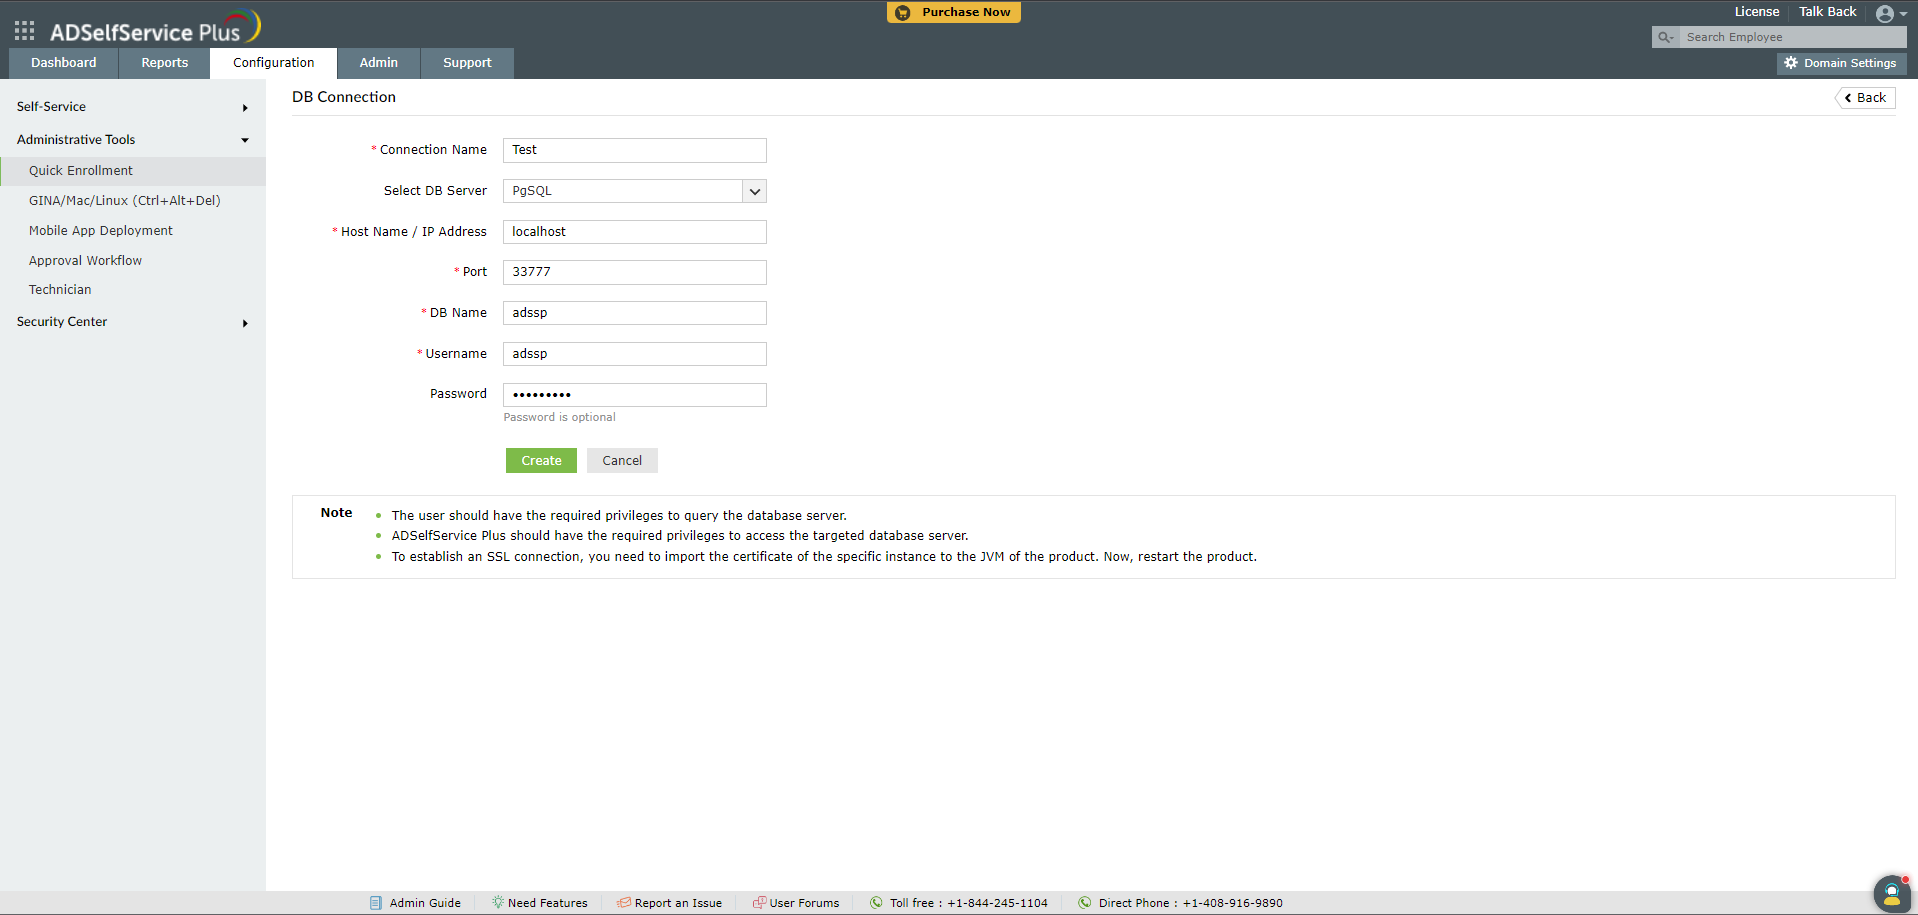
- Click Add New Data Source.
- Enter a Connection Name for the data source.
- Select the type of database that you want to connect to from the Select DB Server drop-down.
- Enter the Host Name/IP Address and Port number of the database server.
- Enter the name of the database that stores your enrollment data in the DB Name field.
- In the Username and Password fields, enter the credentials of a user who has privileges to query the database server.
- Click Create.
Steps for fetching data from the connected database (or) Steps for importing data from the connected database
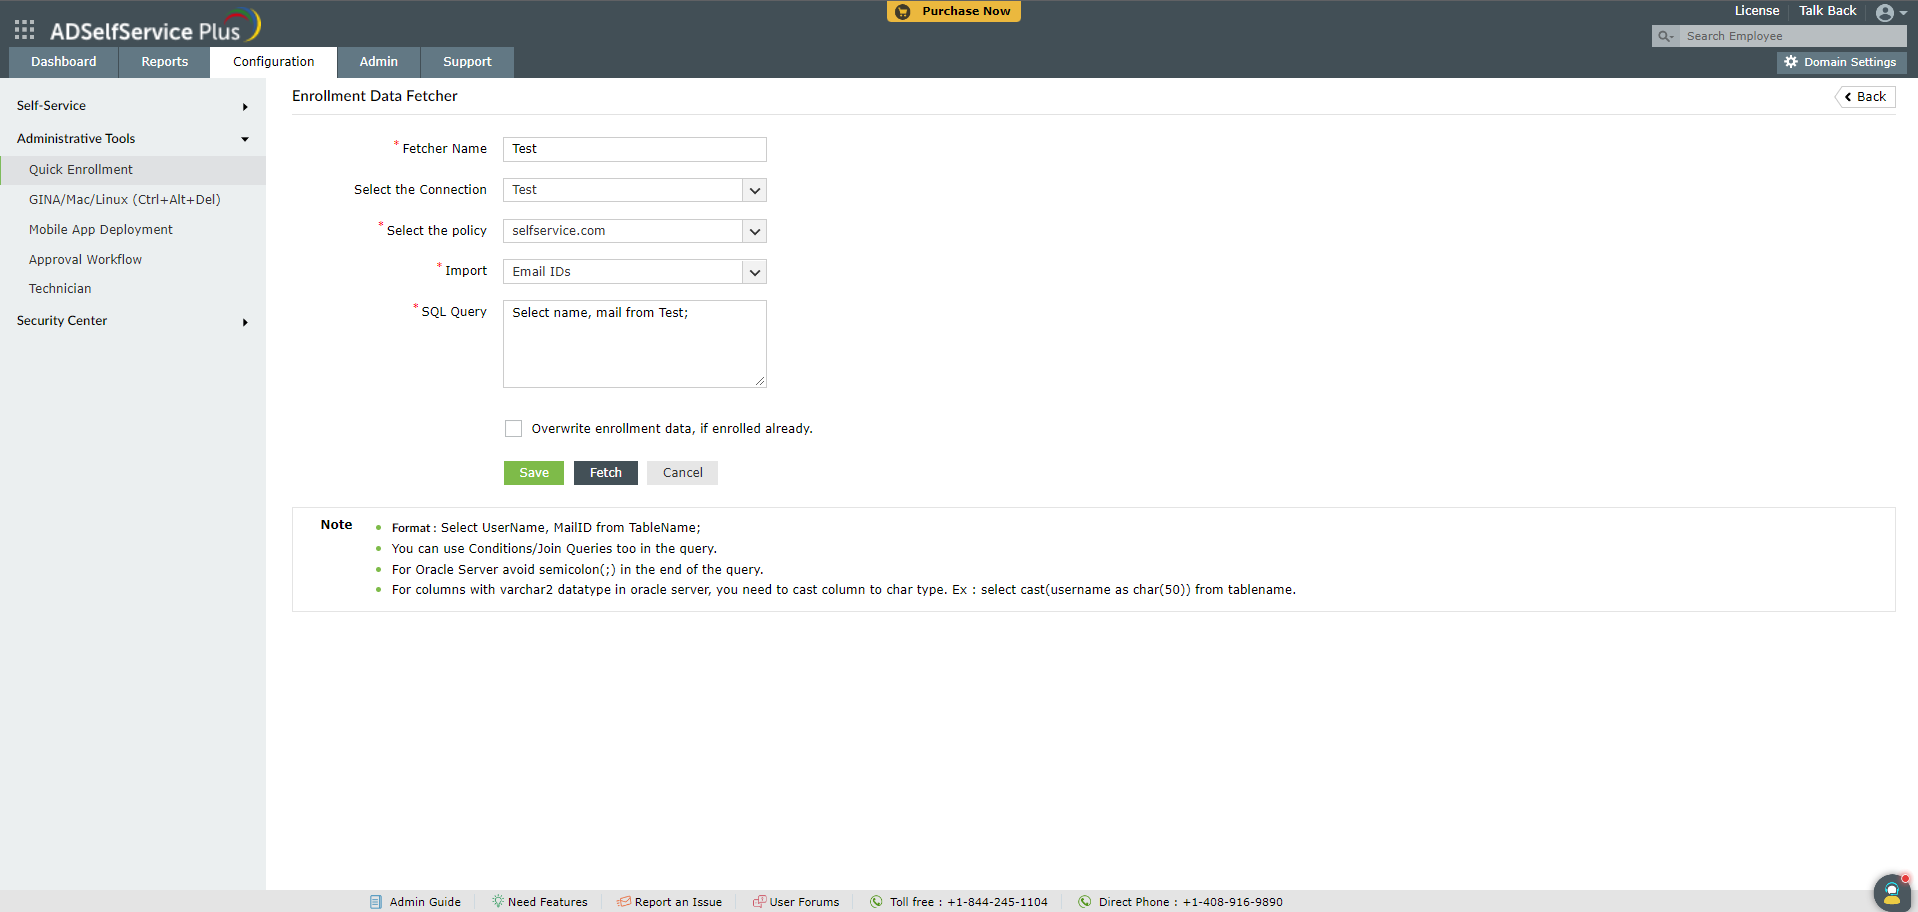
- Back on the Import Enrollment Data from External Database screen, click Add New Fetcher.
- Enter a name in the Fetcher Name field.
- Select the connection that you just created from the Select the Connection drop-down.
- Select a policy from the Select Policy drop-down. If you are importing local users (users who are not part of AD who have accounts on specific machines) from the database, select localusers.domain as the policy.
- Select the enrollment data that you want to import from the Import drop-down.
-
In the SQL Query field, type the appropriate query to fetch the necessary data from the database table. For example, if you have configured Security Question & Answer and Hardware Token and wish to import the data for these authenticators, the following is the sample query that needs to be entered.
Sample query:
Select UserName, Question, Answer, CustomTOTPSecretKey, CustomTOTPHardwareSerialNumber from TableName;
Important note: Ensure the selected authenticators match the order of columns in your SQL query.
-
Click Save.
Methods to import user enrollment data
-
Manually : If new domain users need to be added to the database, then simply click the Fetch Again icon to enroll the newly added users.
-
Automatically : You can also set up a scheduler to update the enrollment data of new domain users at regular intervals automatically.
You can also import and enroll local users through a CSV file. Learn how.


 ADManager Plus
 ADAudit Plus
 ADSelfService Plus
 Exchange Reporter Plus
 M365 Manager Plus
 DataSecurity Plus