☰


Local users are accounts that are created and stored directly on a single computer, with no central management through a network domain. These accounts authenticate using locally stored credentials and are only accessible on the machine where they were created. They can exist on both stand-alone and domain-joined systems and are often used for administrative tasks, Workgroup environments, or offline systems that do not depend on a centralized directory like Active Directory (AD).
ADSelfService Plus helps administrators secure these local accounts using MFA for various actions, including:
Device-based machine MFA can be enabled for following types of machines:
This guide walks you through the steps to enable and configure local user MFA.
To get started, you must first enable local user MFA. To do this:
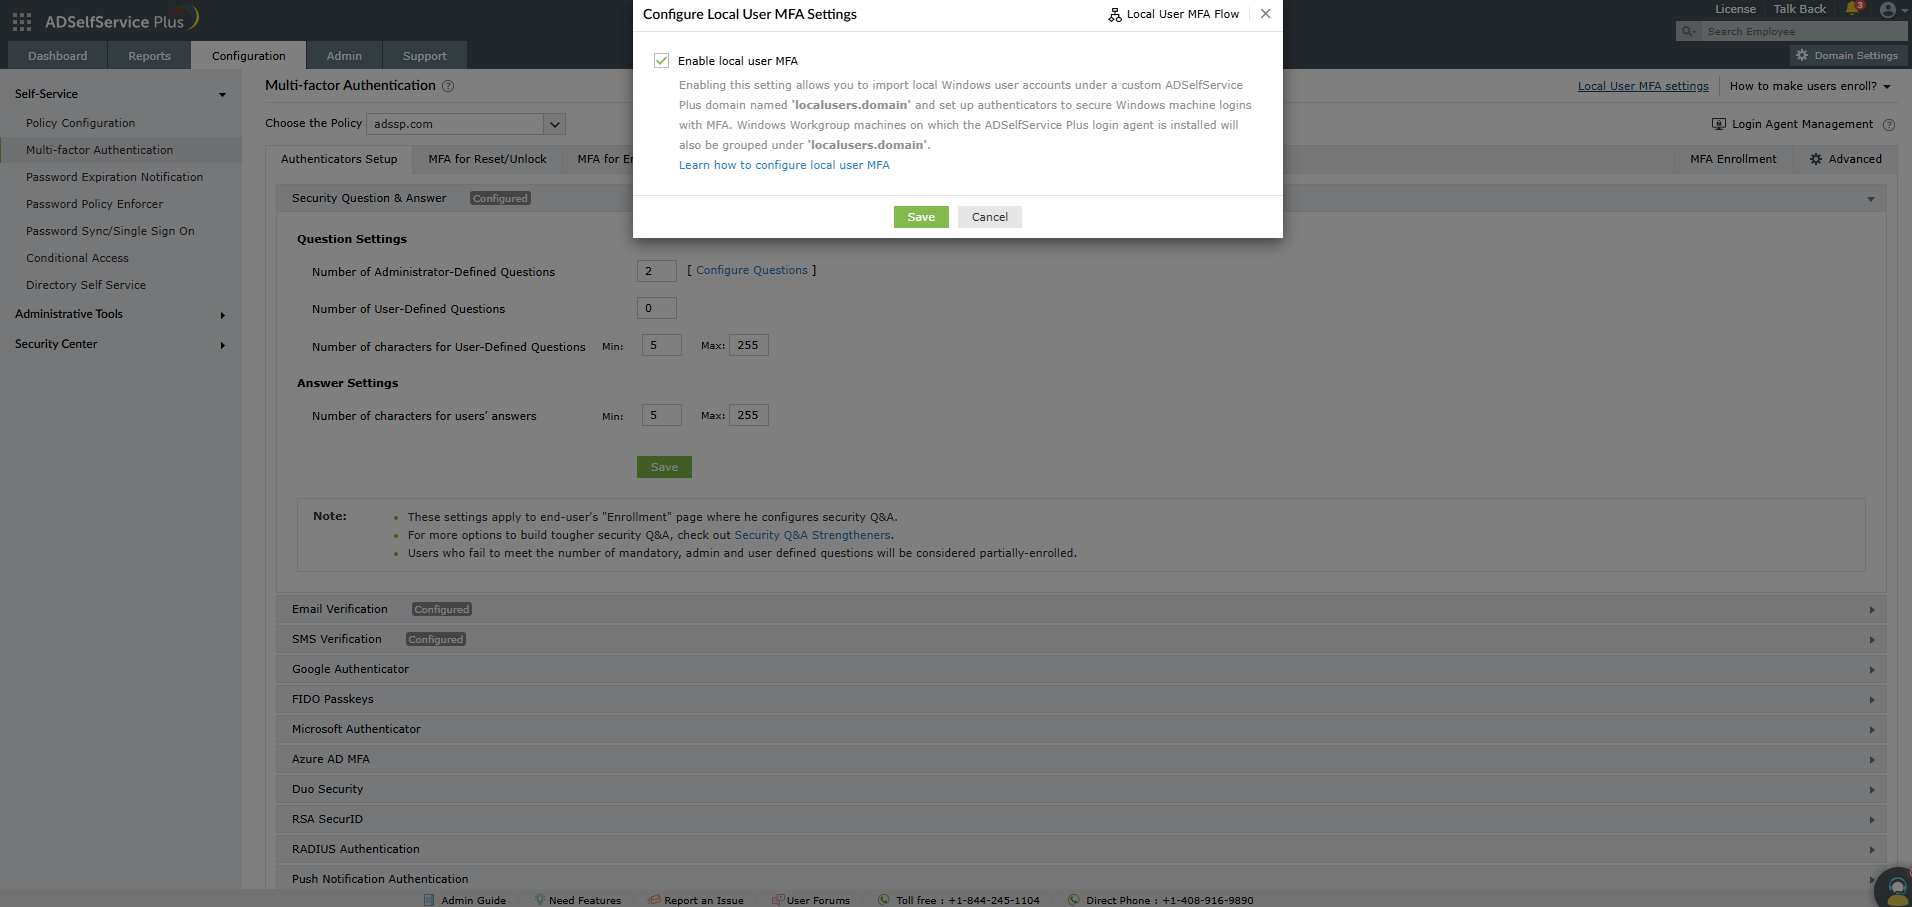
This creates a virtual domain within ADSelfService Plus called LocalUser.domain, into which local users and Workgroup (local) Windows computers on which the agent is installed are grouped.
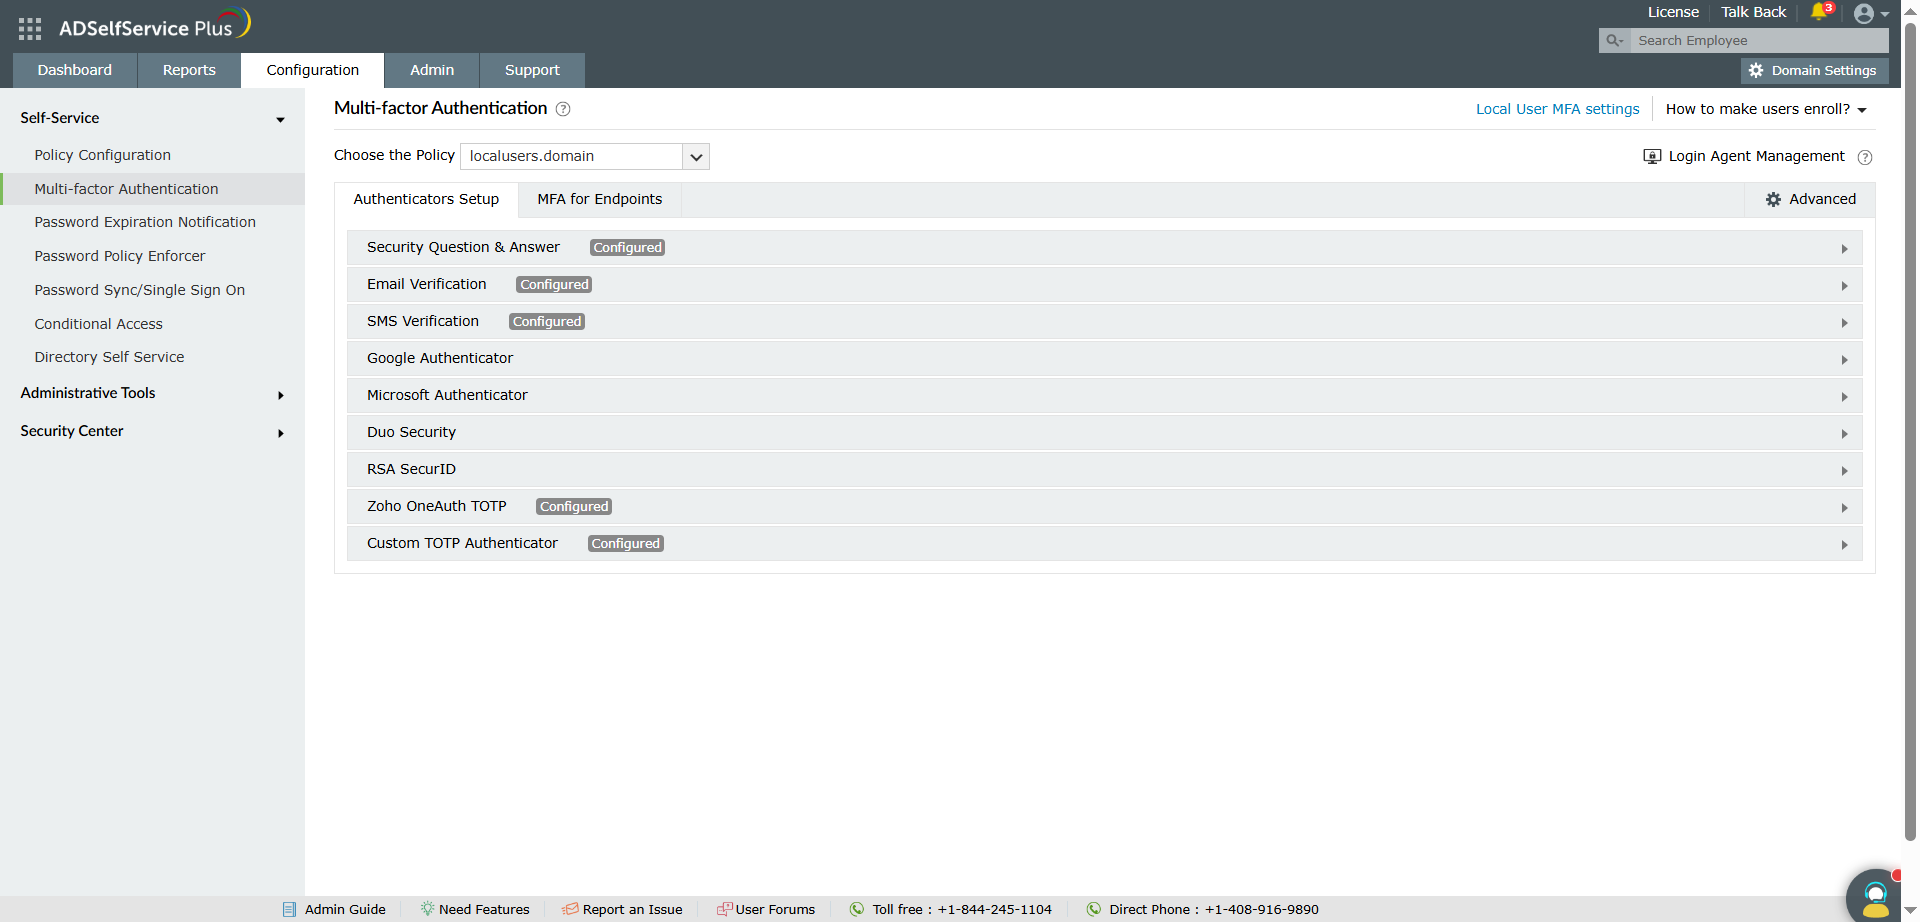
After enabling local user MFA, follow these steps to configure authenticators:
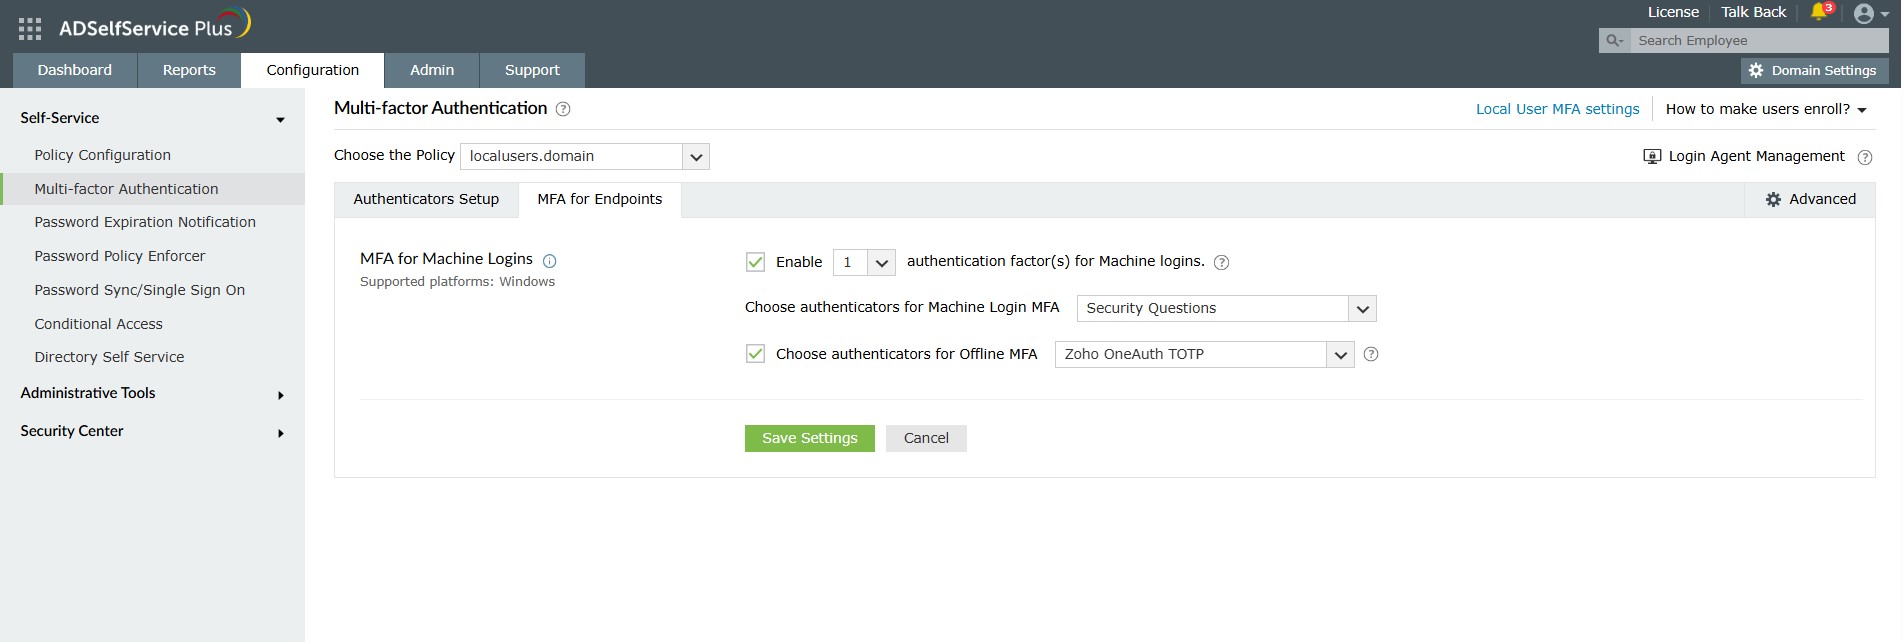
Navigate to MFA for Endpoints > MFA for Machine Logins .
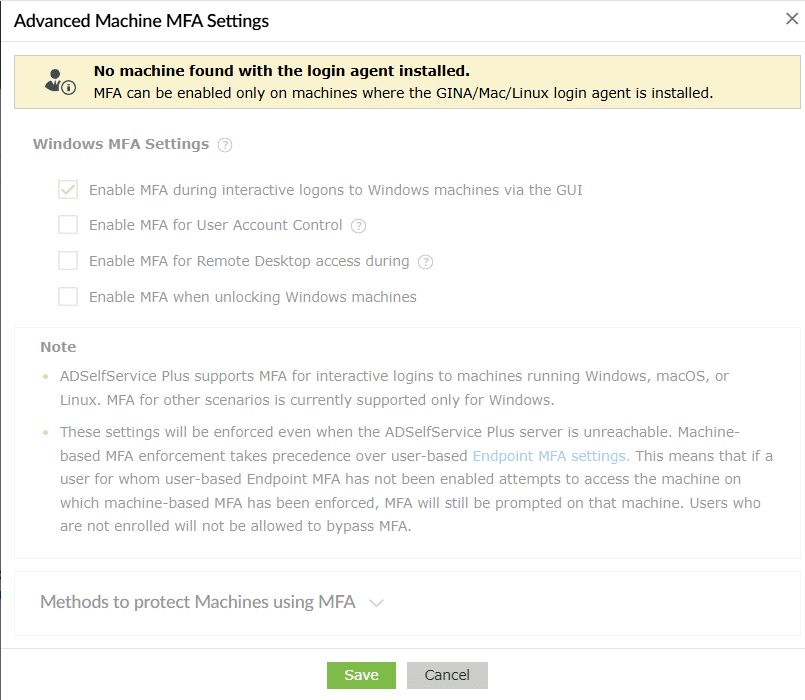
Local user MFA works by linking the Windows machine with the ADSelfService Plus server via the ADSelfService Plus Windows login agent. You must install this agent on every (domain-joined or Workgroup) machine where MFA is needed.
On domain-joined machines: You can install the ADSelfService Plus login agent on domain-joined Windows machines manually, via a GPO , or through tools like Microsoft Configuration Manager or ManageEngine Endpoint Central .
On Workgroup machines: The login agent cannot be installed or managed on Windows workgroup machines from ADSelfService Plus. You will need to perform these actions manually, or through tools like Microsoft Configuration Manager or ManageEngine Endpoint Central .
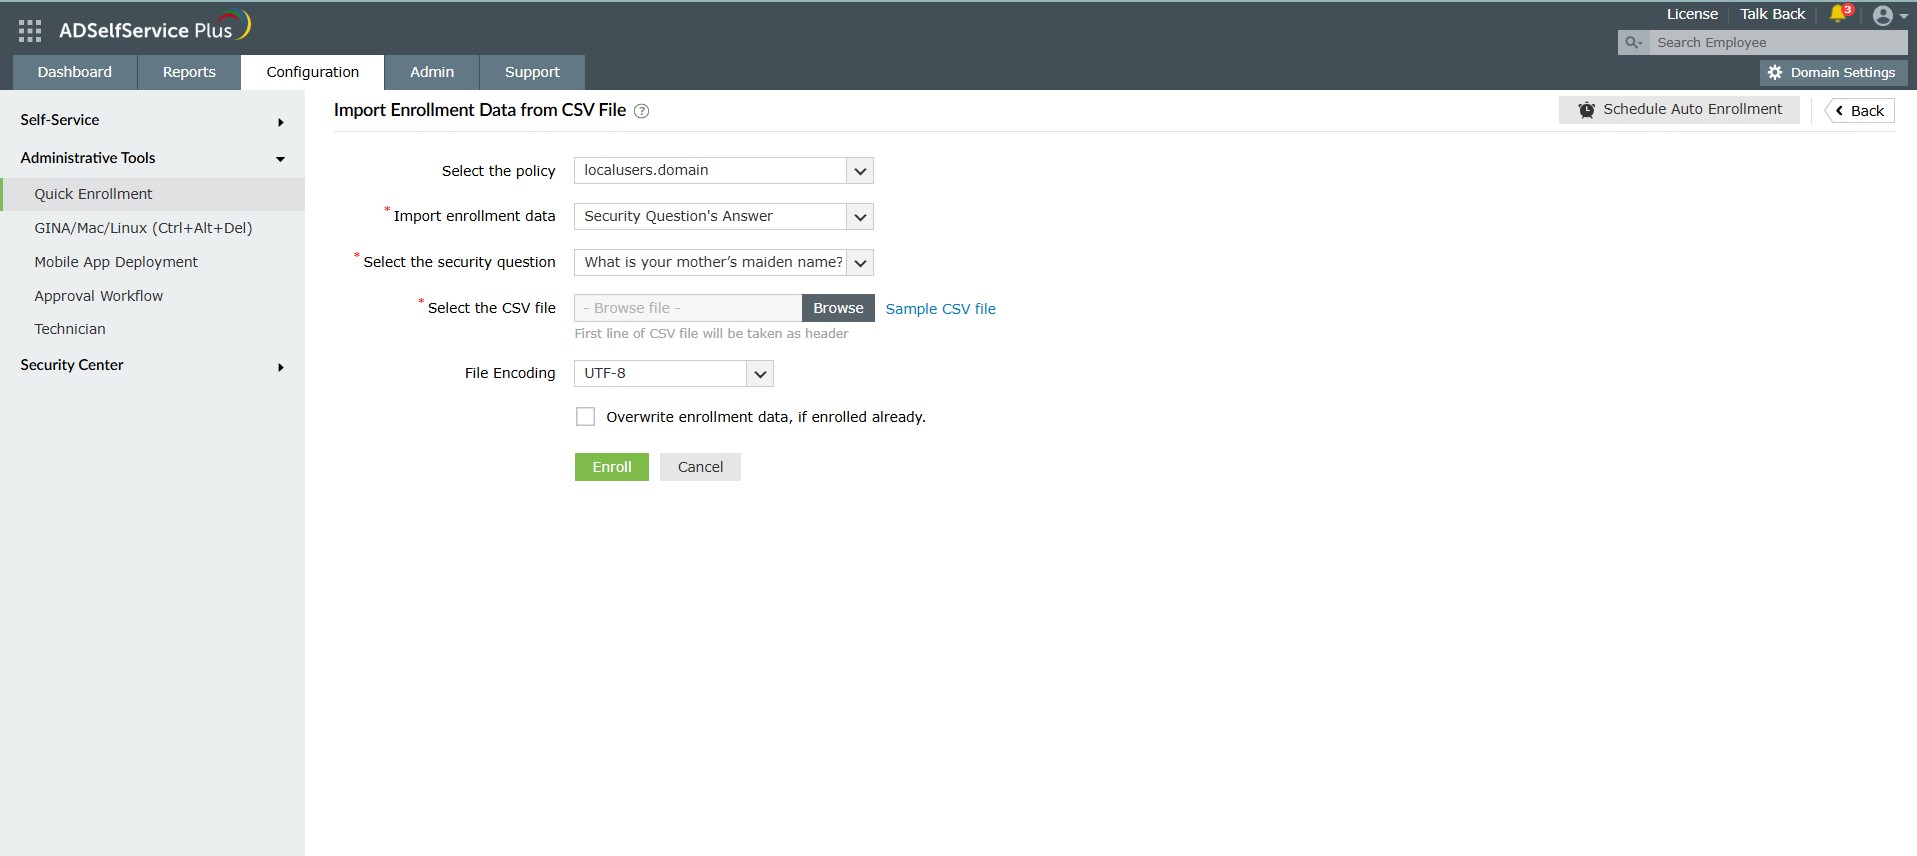
After the login agent is installed on the relevant Windows machines, you need to import and enroll local user accounts. To do so:
External Database: Navigate to Quick Enrollment > Import enrollment data from external database. Learn more
Self-enrollment is currently not supported for Windows local users. Only the admin can enroll local users and manage their enrollment information.
A local user cannot be enrolled if their username is the same as another local user's who is already enrolled.
If the username of a local user who has already been enrolled is changed on the machine, the user must be re-enrolled in the product using the new username.
Admins can track enrollment, activity, failures, agent deployment, and authenticator usage from the following reports:
Once deployed, view all systems with the login agent installed under:Configuration > Administrative Tools > GINA/mac/Linux Installation > Installed Machines.
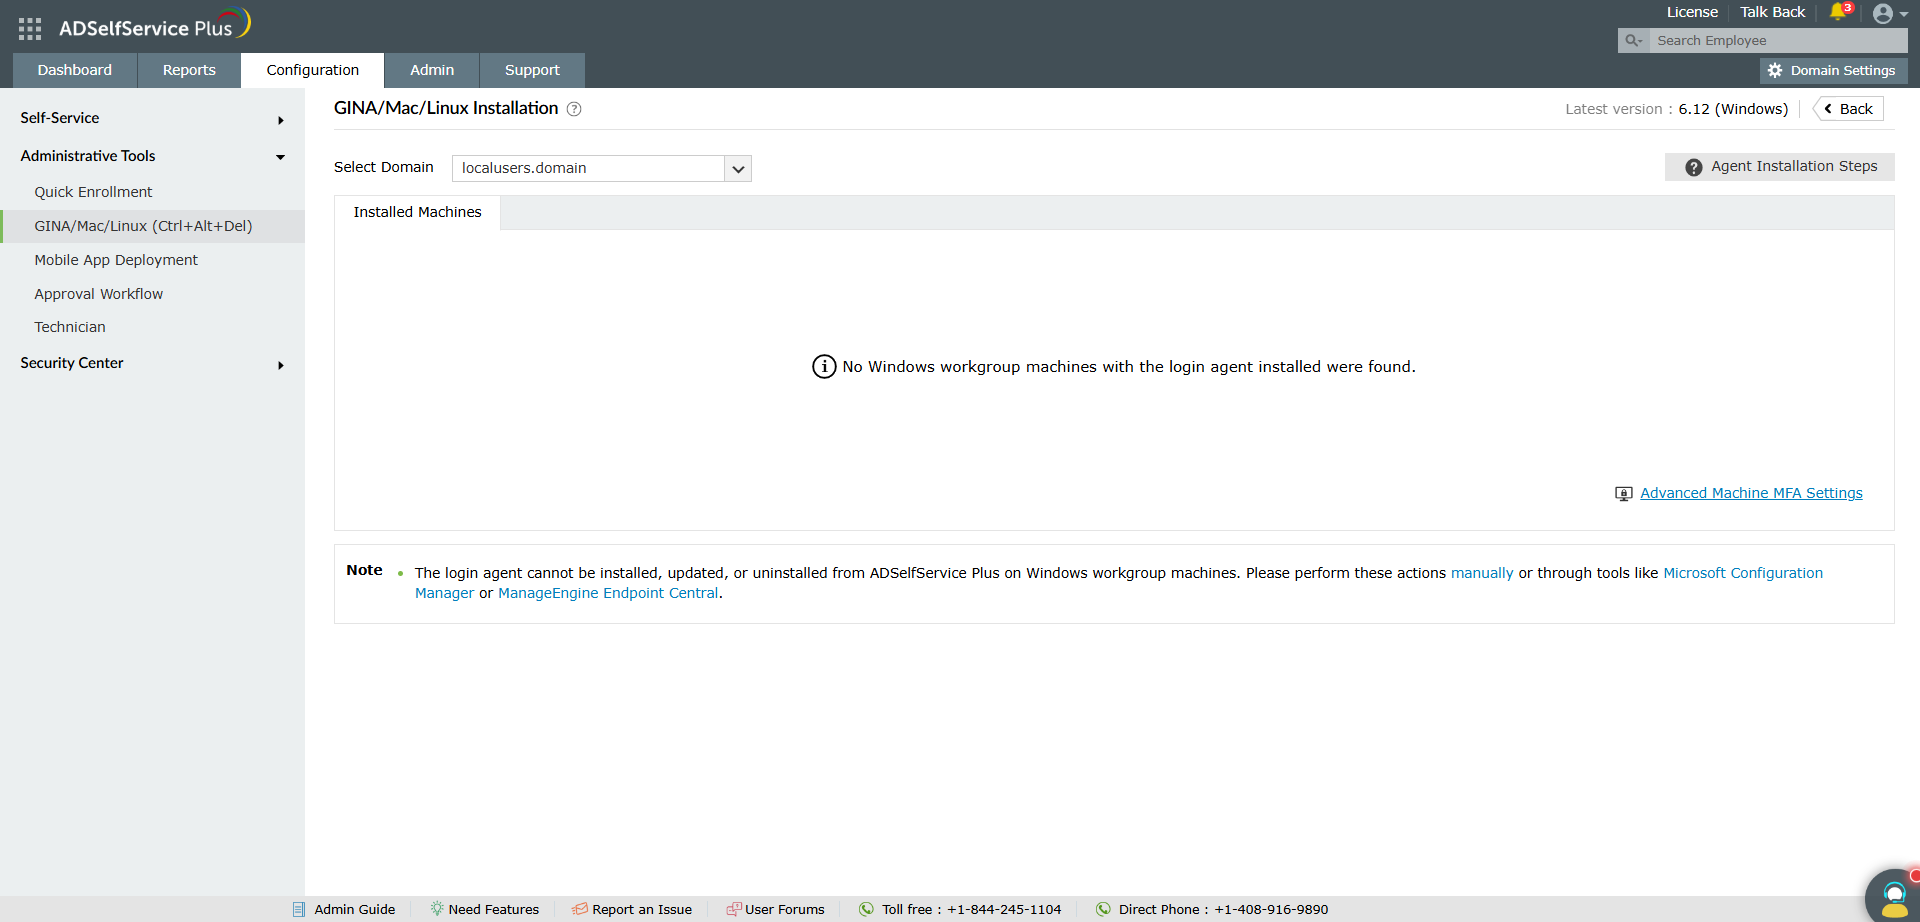
This report can be viewed for both domain-joined and Workgroup Windows machines.
Workgroup machines on which the agent is installed will appear under localusers.domain.
Copyright © 2026, ZOHO Corp. All Rights Reserved.
 ADManager Plus
 ADAudit Plus
 Exchange Reporter Plus
 M365 Manager Plus